As the popularity of eCommerce continues to rise, brands are increasingly opting for online platforms to sell their products. Among the leading choices are Squarespace and Shopify, each offering a range of features to enhance the shopping experience.
However, as your business evolves, you may find that Shopify—hosting over 4.79 million live stores worldwide—better meets your growing eCommerce needs with its dedicated capabilities.
So, if you started your eCommerce journey with Squarespace and have experienced exponential growth since then, migrating to Shopify may be the next best step.
Now, while it might seem complex to migrate from Squarespace to Shopify, we’re here to walk you through the whole migration process with a step-by-step guide. Hopefully, it’ll simplify the transition for you.
Why Switch from Squarespace to Shopify?
From an eCommerce standpoint, switching to Shopify is highly beneficial. Below, we’ve listed some benefits that you’ll enjoy after switching:
Superior E-Commerce Features
While Squarespace offers e-commerce capabilities, Shopify is designed specifically for online stores, making it a more powerful platform for scaling a business.
It supports advanced features like automated cart recovery, in-depth analytics, and multichannel integration (social media, Amazon, etc.), making Shopify the go-to platform for businesses focused on growing their online sales.
Broader Payment Gateway Options
One of the platforms’ key strengths is its wide range of payment options. Squarespace limits users to only a few payment gateways like Stripe, PayPal, etc., which can be restrictive, particularly for international businesses.
Shopify, on the other hand, supports over 100 payment gateways, allowing businesses to cater to a global customer base. This can result in more seamless transactions and fewer lost sales, as customers are more likely to find a preferred payment method.
Advanced Reporting and Analytics
One of the critical features that make Shopify a better option for eCommerce is its strong reporting capabilities. Even on its basic plan, businesses can access insightful data on sales, customers, and marketing efforts.
Advanced plans offer more in-depth reports, including custom reports and third-party analytics integrations like Google Analytics.
On the other hand, Squarespace offers limited reporting tools, focusing more on design aesthetics than providing the analytics required to optimize an online store.
Extensive SEO and Marketing Tools
Shopify is known for its strong SEO capabilities and marketing tools, which can drive more traffic to your store. It offers built-in features like customizable meta tags, URL structures, and the ability to integrate with Google Shopping and Facebook ads.
Now, Squarespace also has SEO tools, but they are not as comprehensive, limiting your ability to fully optimize your store for search engines.
Easier Scalability and App Integrations
As your store grows, Shopify will offer numerous apps to extend its functionality. From SEO tools to advanced marketing features – the Shopify App Store includes over 8,000 apps, allowing store owners to scale more easily.
While Squarespace has some integration options, its ecosystem is much smaller, meaning you’ll find fewer tools to customize your store.
Shopify is also more suitable for businesses with complex product catalogs due to its more flexible product and inventory management systems.
Step-by-Step Guide to Migrating Your Site From Squarespace to Shopify
Step 1: Create a Shopify Account and Store

If you already have a Shopify account and store, feel free to skip this step. If not, follow the steps below to get started:
- Go to Shopify.com and sign up for a Shopify account.
- During sign-up, you’ll create your store’s name and choose a subscription plan.
- Once the store is created, customize its settings and preferences to match your business needs.
Step 2: Find and Add a Shopify Theme

Your store’s theme is the first impression customers will get, so it’s essential to pick one that reflects your brand and enhances the shopping experience.
The platform offers a variety of beautiful themes, both free and paid, that are easy to add and customize to fit your store’s needs.
- Go to your Shopify admin page.
- Click on “Online Store” and then “Themes.”
- Select “Explore Themes” to browse the Theme Store.
- Preview themes by clicking on them to see how they look and function.
- Once you’ve selected a theme, click Add to install it in your store.
Step 3: Export the Data From Your Squarespace Store
After creating a Shopify account, the first step to transfer Squarespace to Shopify is to export the store data from your Squarespace store. It includes data like your orders, products, and customers’ data. Follow the below steps to export all your data for each category.
1. Exporting Your Products
- Log in to your Squarespace account and go to the Admin Home Menu.
- Click on Selling, then choose Products.
- In the top right corner, click on Export All.
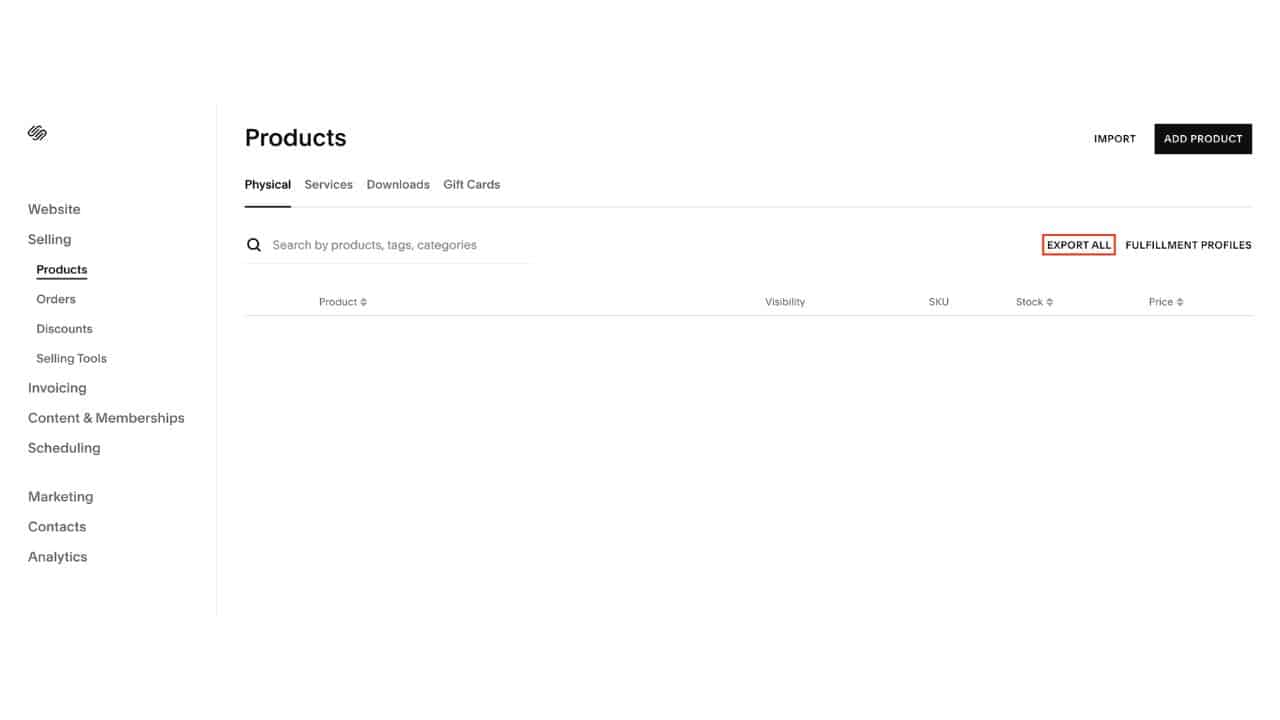
This way, a CSV file containing all your products will be downloaded to your computer.
2. Exporting Your Orders
- Go to the Home Menu in your Squarespace store
- Click on Selling, then select Orders.
- Click on the Export or Download CSV button in the top right corner.
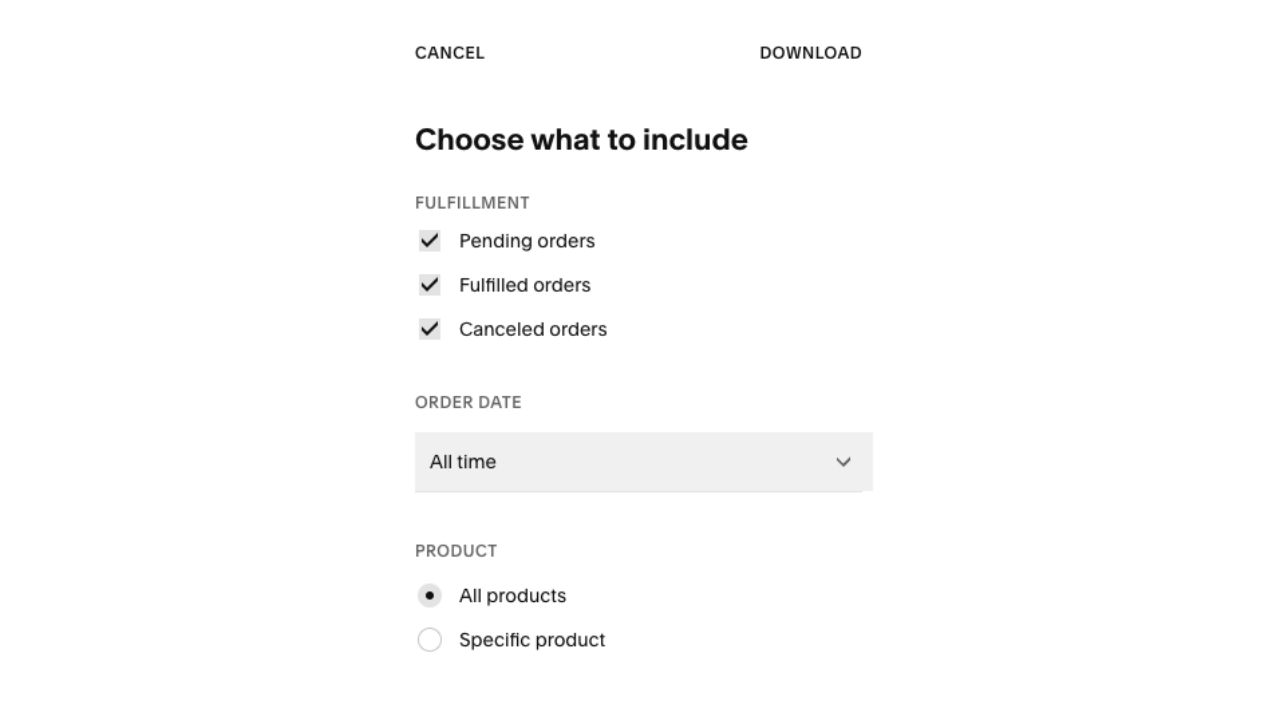
A CSV file containing all order information will be downloaded.
|
Considerations:
|
3. Exporting Your Customers
- In the Admin Home Menu, select Contacts.
- Click on All Contacts.
- Click on the “…” icon in the top right corner.
- Select EXPORT ALL CONTACTS and confirm.
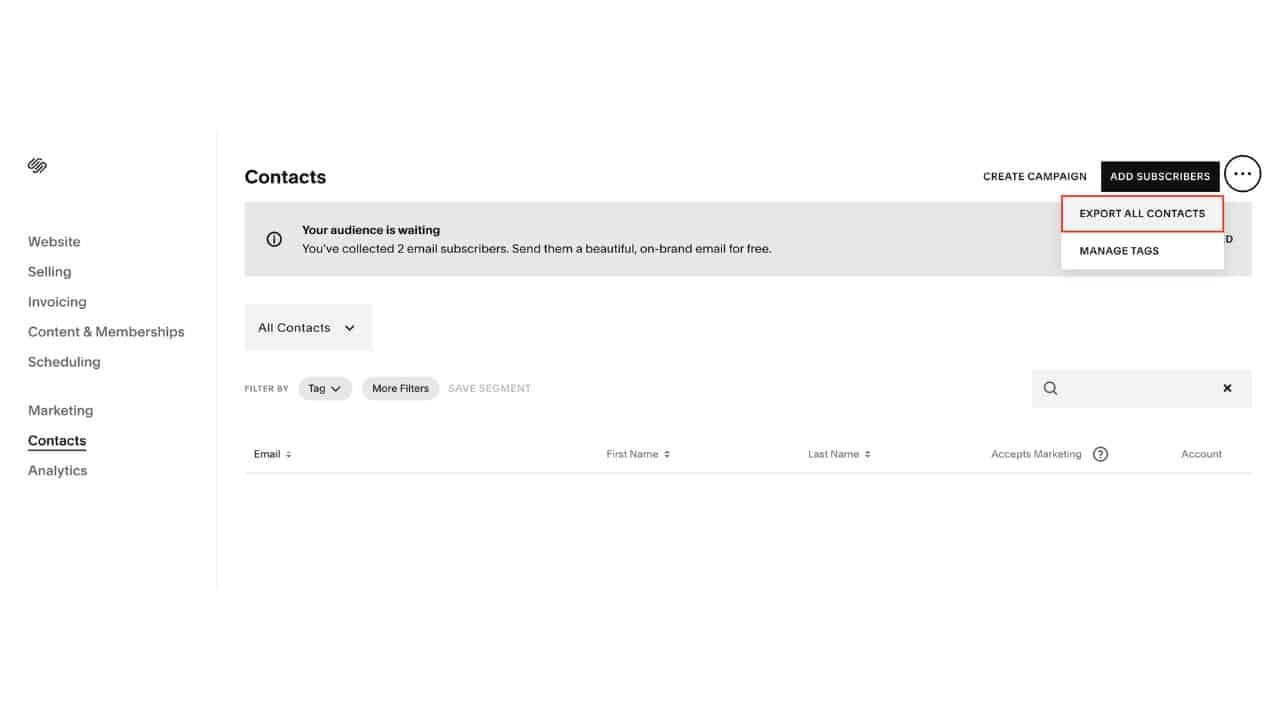
This will download a CSV file with all customer details, including billing and shipping addresses.
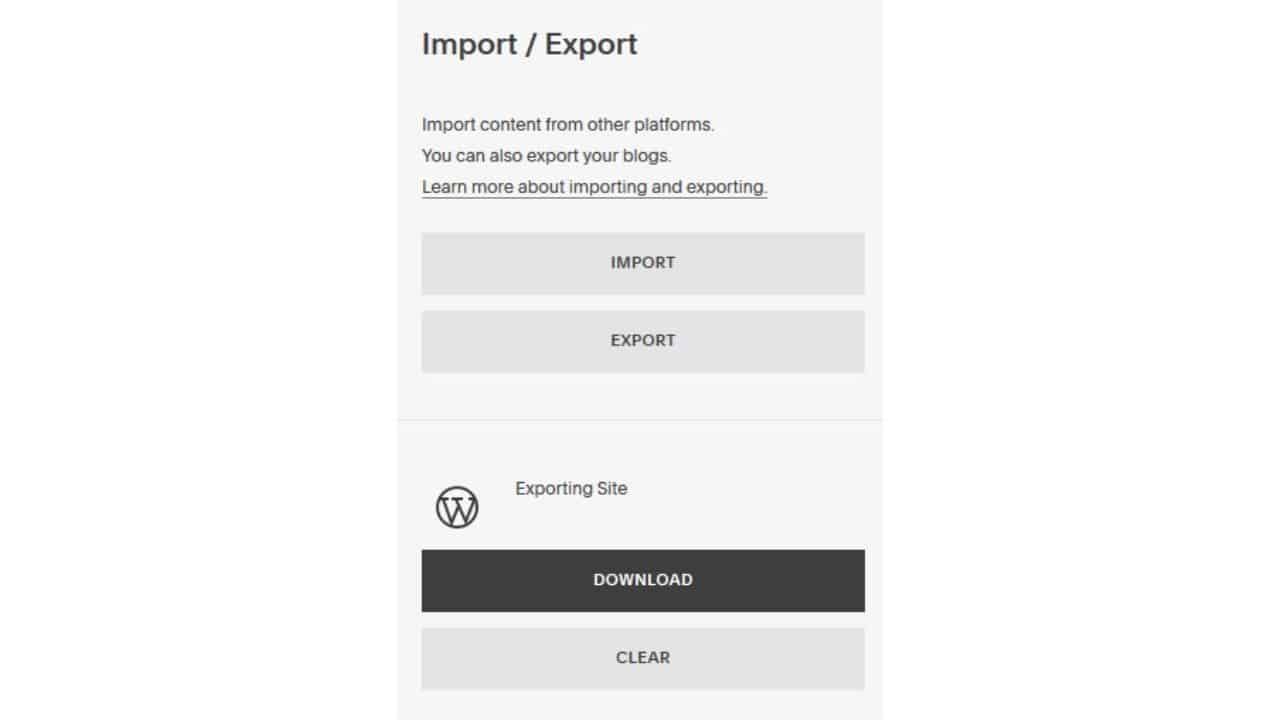
4. Exporting Your Content
- Go to the Home Menu, then click on Settings
- Navigate to Advanced, and then choose Import/ Export.
- Click on Export.
- Select the WordPress icon.
- Once the export is completed, a download option will appear.
- Click Download to save the XML file.
Following these steps will help you gather the necessary data from Squarespace to proceed with the migration to Shopify.
Step 4: Import the Data to Your New Shopify Store
Once you’ve successfully exported your data from Squarespace, the next step is to import that data into your Shopify store. This is the most important and time-consuming part of the migration process.
Now, there are three methods to transfer all your data.
#1: Manual Data Transfer Via CSV Files
If you’re planning to import your data manually through comma-separated value (CSV) files, here’s how to do it:
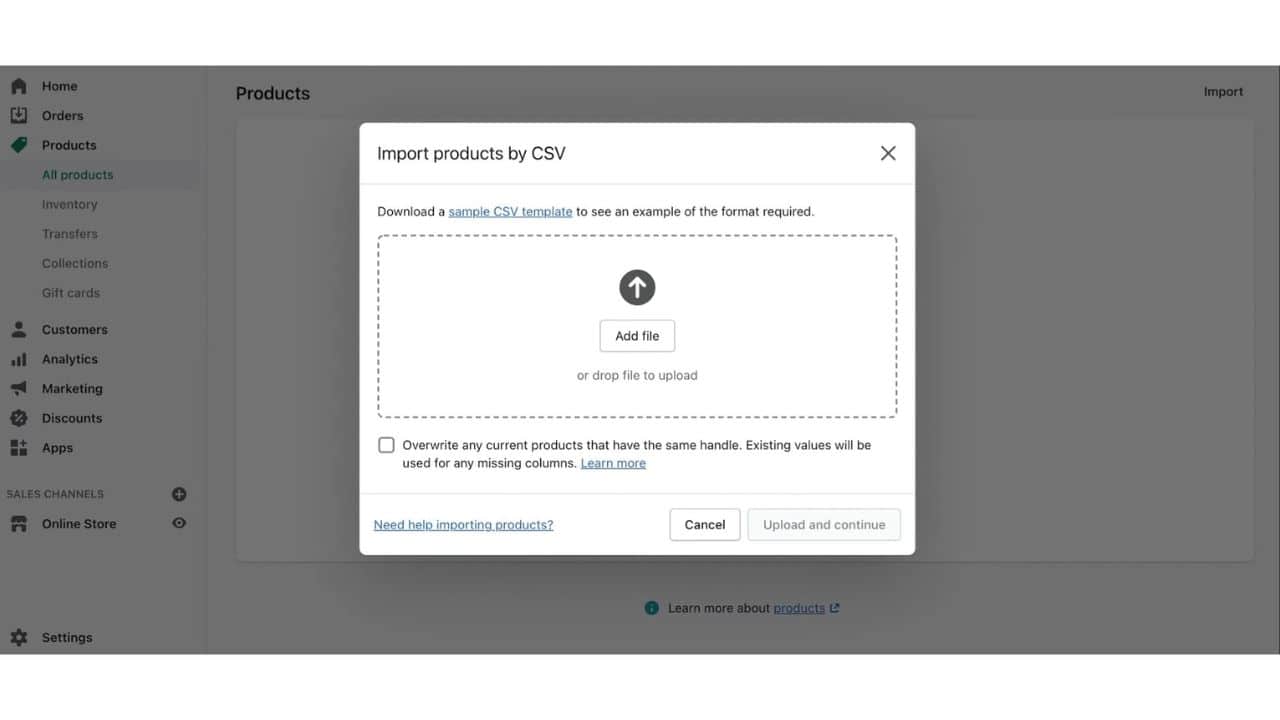
To Import Products
- Go to Shopify Admin > Products > Import.
- Click “Add file” and select the Squarespace product CSV file.
- Click “Upload and preview.”
- Review the details once more and click “Import products.”
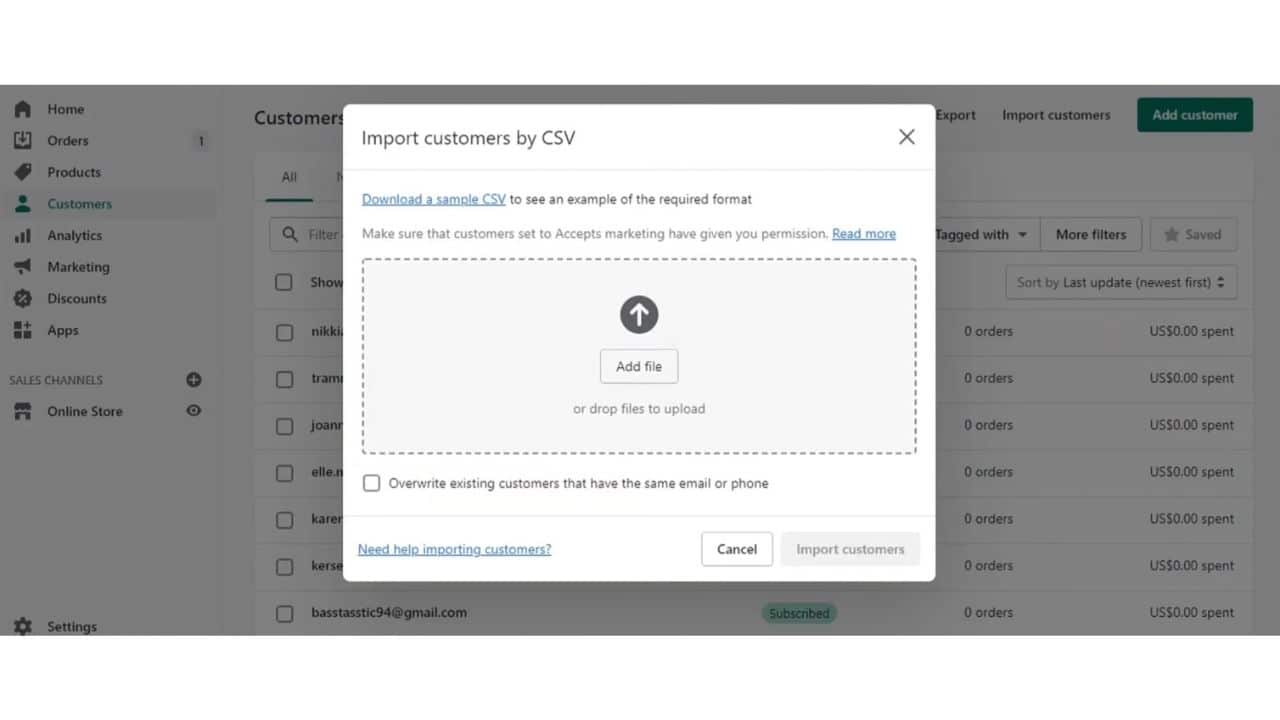
To Import Customers
- Go to Shopify Admin > Customers > Import.
- Click “Add file” and select the Squarespace customer CSV file.
- Click “Import customers.”
- Review the import details and click “Import customers.”
To Import Orders
To transfer orders, you might need to use third-party apps, as Shopify doesn’t support direct order imports via CSV files.
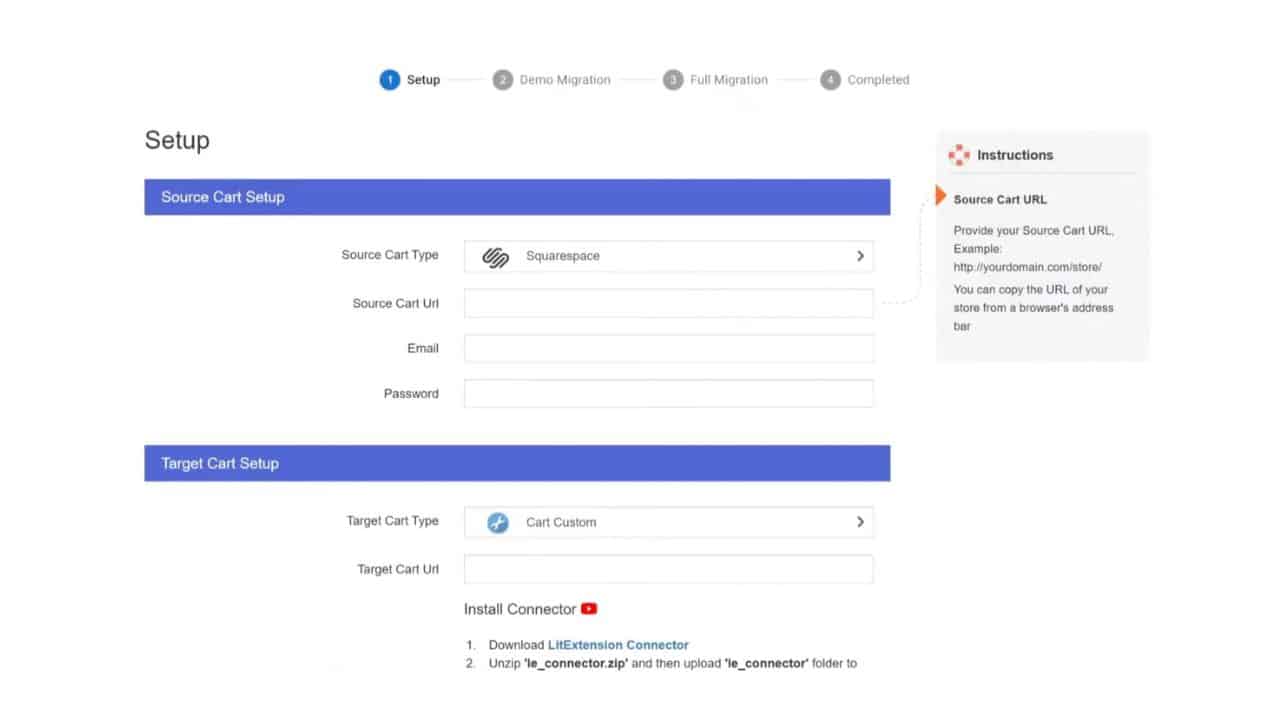
#2: Using a Shopify Migration App
As the name implies, this method involves using one of the many migration apps available on Shopify. These apps use APIs to transfer the data, meaning they can be used to move large amounts of data in one go.
While you can choose from free and paid apps, here are some options that you can consider:
For instance, in Litextension, you choose Squarespace as the source and Shopify as the target. Then, select the data you want to move and done.
#3: Copy and Paste Method
This is strictly a manual process of moving the website from Squarespace to Shopify. In this, you pick and choose the content you want to move. Simply copy the content from Squarespace and paste it into the appropriate spaces of your Shopify store. Please note that this method is only viable for small businesses.
Step 5: Review the Product Data in Your Shopify Store
After completing the import process, the next step is to review the imported product data to ensure that everything is transferred correctly. This review will help identify any errors or required changes.
Common Import Behaviors and Errors
Below are some common issues that you should be on the lookout for when importing data into Shopify and making adjustments as needed:
-
Some Data Failed to Import
This issue may involve products, orders, or customers. Note that Squarespace has a limit of 2000 products for export, with each variant counting as a separate product. For instance, a product with 4 variants in Squarespace will be considered 4 individual products.
If your store contains 3000 products and variants, only 2000 will be imported, leaving 1000 unaccounted for. You’ll need to manually add these remaining products to your Shopify store.
Alternatively, you can import additional data over the existing data. To do this, return to your Squarespace store, select only the products that weren’t imported, and export them as a CSV file.
In Shopify, click “Start New Import.” Your previous data won’t be deleted, and any products that match the existing ones in your store will not be duplicated.
-
Products Imported Successfully but Not Published
If products were successfully imported but remain unpublished, it usually indicates that the product visibility was set to “hidden” during the Squarespace export.
To resolve this, manually update the visibility settings in Shopify to make these products available on your sales channels.
-
Missing Product Variants
If some product variants are absent, it suggests that the product did not import completely. You’ll need to manually add the missing variants to your Shopify store.
-
Missing Product Dimensions
If any product dimensions are missing, you must manually input these details into your product descriptions.
Step 6: Set Up Shipping
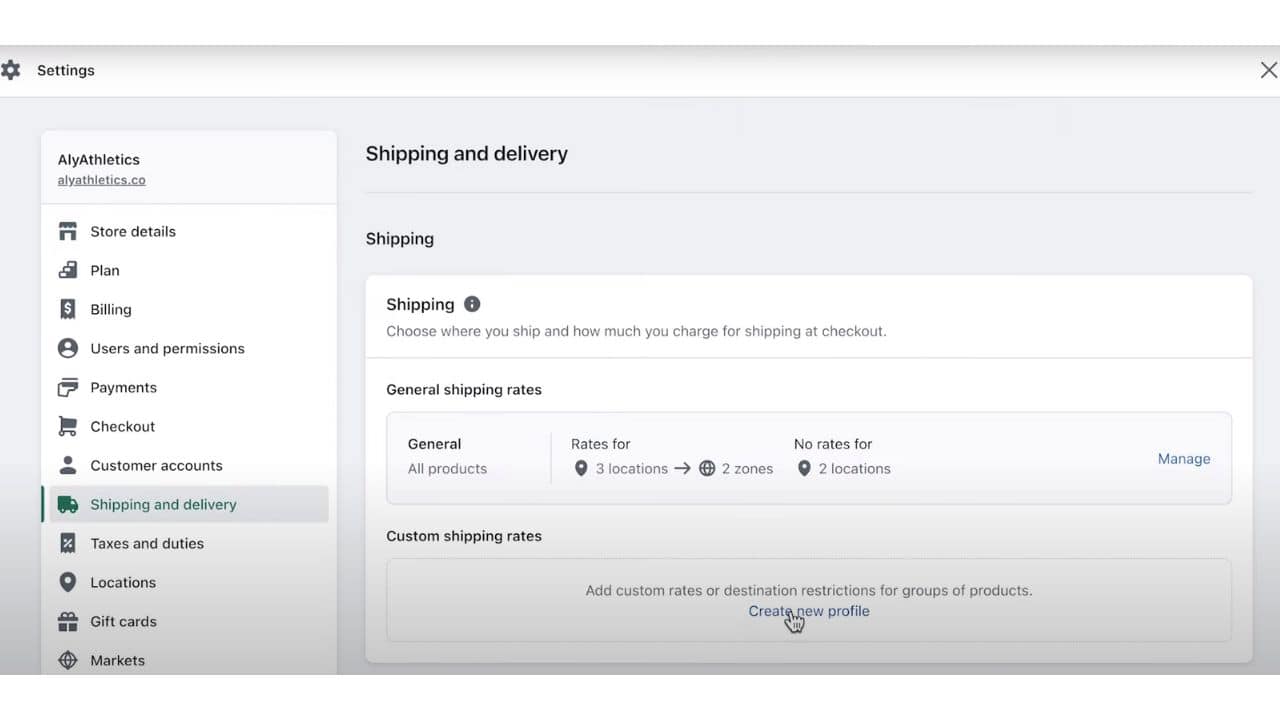
Once you’ve moved all your data, you need to make some tweaks to help Shopify handle and calculate shipping costs. To set up shipping, follow these steps:
- Click on Shipping and delivery under Settings.
- Add current shipping address for accurate shipping rates.
- Enable shipping to different regions and countries (if applicable).
- Set up shipping rates for the mentioned shipping areas.
|
NOTE: Add accurate information in this process to avoid overcharging. |
Step 7: Set Up Taxes
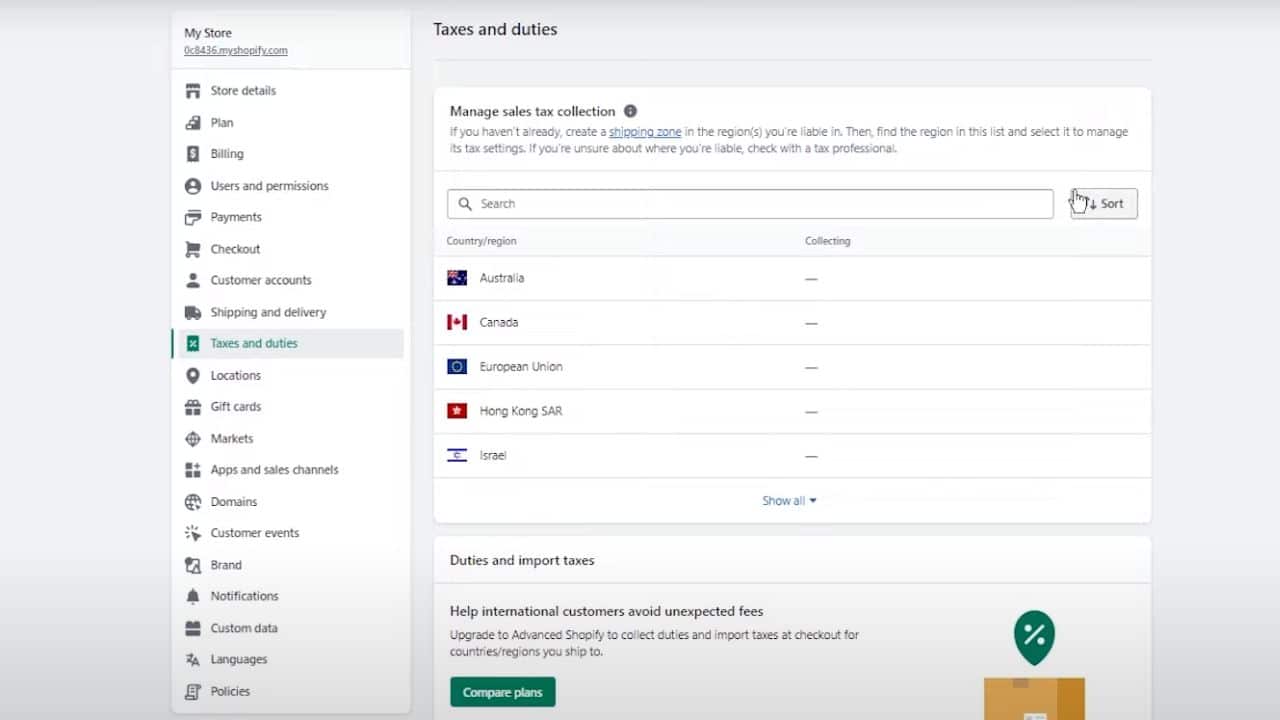
After adding shipping information, Shopify will automatically calculate tax based on the destination and that particular location’s tax regulations.
However, to remove tax calculations for products that are exempt from tax, you need to do a tax override. Here’s how to do it:
- Click on Products on the Shopify Dashboard.
- Navigate and click the Pricing section.
- Then select the product and uncheck the Charge taxes on this product.
- Click Save.
Step 7: Set Up Payment Providers
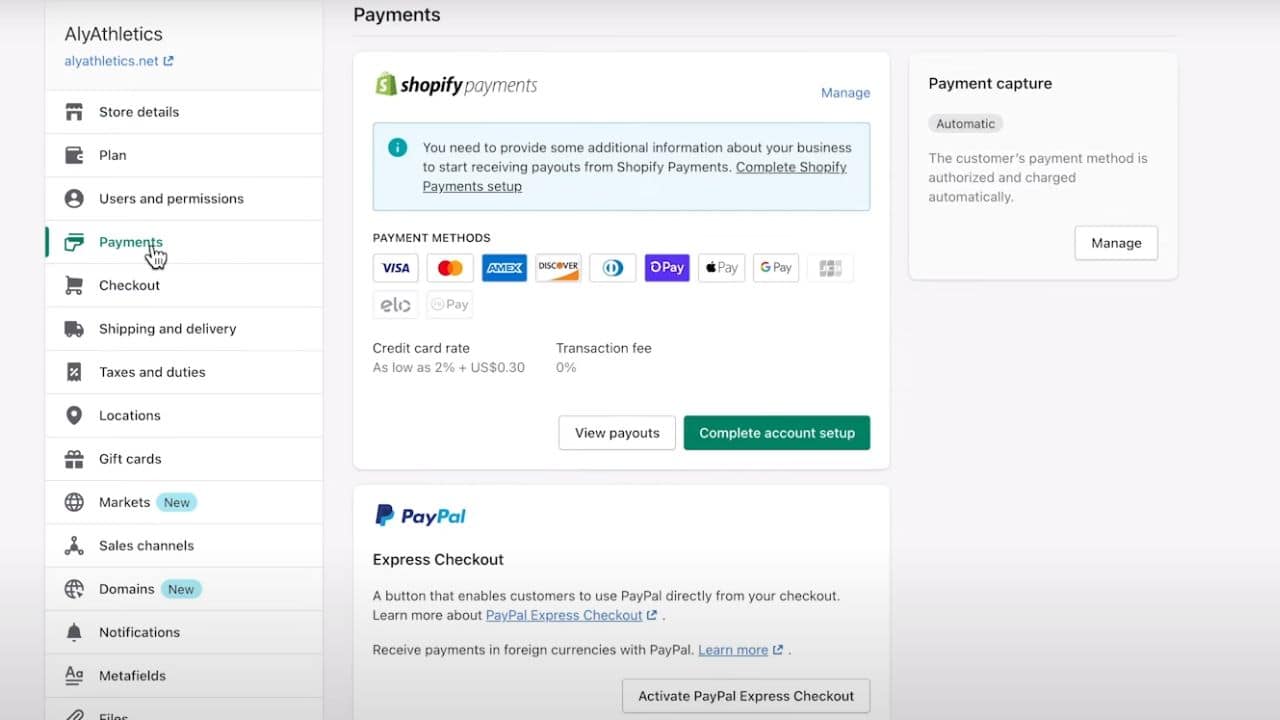
The next step is to enable payments on your Shopify store. To do this, you’d need to choose a payment provider by going into Settings, selecting Payments, and completing your account setup.
|
NOTE: If you have a credit card payment provider, you can simply click on Activate Shopify Payments, add banking details, and press Save. |
Step 8: Test Orders
Once you’ve moved all of your data and finished setting up your store, you need to test orders to ensure everything is working properly.
Disable Real Payment Methods
- Go to your Shopify dashboard.
- Click on Settings at the bottom left.
- Navigate to Payments and find your enabled credit card provider.
- Click Manage.
- Select Deactivate to disable the real payment method.
A popup will appear to confirm the deactivation.
Set Up Bogus Gateway for Testing
- In the Shopify Payments section, click Manage.
- Choose Switch to a third-party provider. Confirm this action when prompted.
- Scroll down to the See all providers option and click on it.
- From the dropdown menu, select (for testing) Bogus Gateway.
- Click Activate to enable the Bogus Gateway.
- Click Save to confirm.
Place a Test Order
Now that the test gateway is enabled, simulate a customer purchase to test your store’s checkout process:
- Go to your store and add a product to your cart.
- During checkout, use the following test credit card details:
- Name on card: Bogus Gateway
- Credit Card Number:
- Enter 1 for a successful transaction.
- Enter 2 for a failed transaction.
- Enter 3 to trigger an error message.
- CVV: 111
- Expiry date: Any future date.
Check for Issues
Completing the test order will allow you to see if there are any issues with your checkout process, such as payment errors, order confirmations, or product availability.
Revert to Real Payment Methods
After you’ve successfully run your test orders:
- Return to the Payments section in your dashboard.
- Click Manage next to (for testing) Bogus Gateway.
- Click Deactivate to remove the Bogus Gateway.
Reactivate your real payment method by following the same steps as before, selecting your preferred provider.
Step 9: Switch Your Website’s Domain
After importing all your products, customers, orders, and content into Shopify and setting up your new store, the final step is to transfer your domain. This step ensures that your website visitors are directed to your new Shopify store instead of the old Squarespace site.
However, before beginning the transfer, make sure your domain has been registered with Squarespace for at least 60 days. This requirement is mandatory in order to proceed with the domain switch.
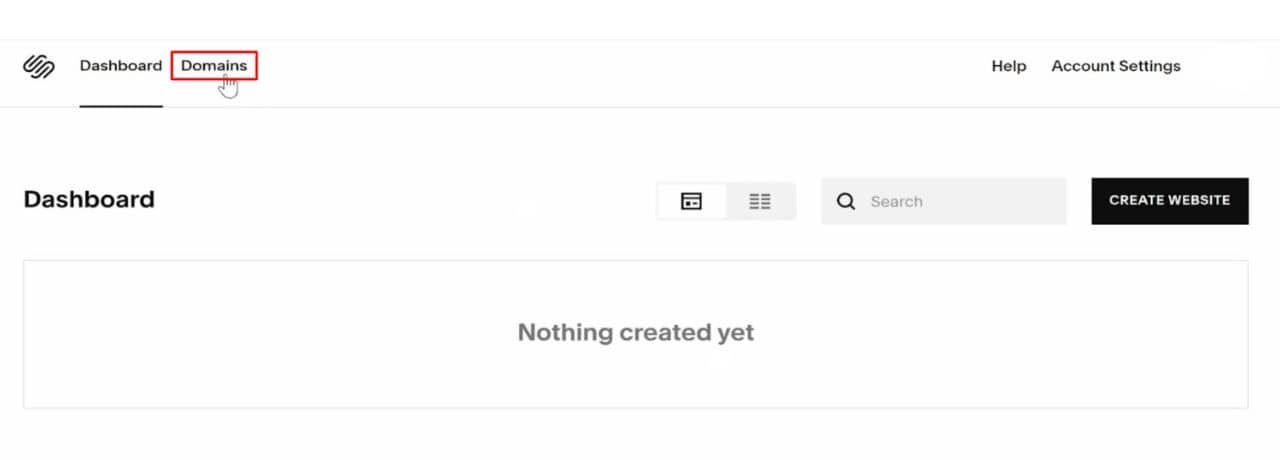
- Unlock Your Domain on Squarespace
- Start by going to the Home Menu in your Squarespace store.
- Click on Settings and select Domains.
- Choose the domain you wish to transfer and make sure the “Lock Domain” option is unchecked.
- Once unlocked, a “Get Transfer Key” button will appear at the bottom of the screen.
- Click on this button to generate and copy the transfer key.
You will need this key, also known as an “Authorization Code” or “EPP Code,” to authorize the transfer with your new domain provider.
- Transfer the Domain to Shopify
- Go to your Shopify Admin page.
- Select Online Store and then go to Domains.
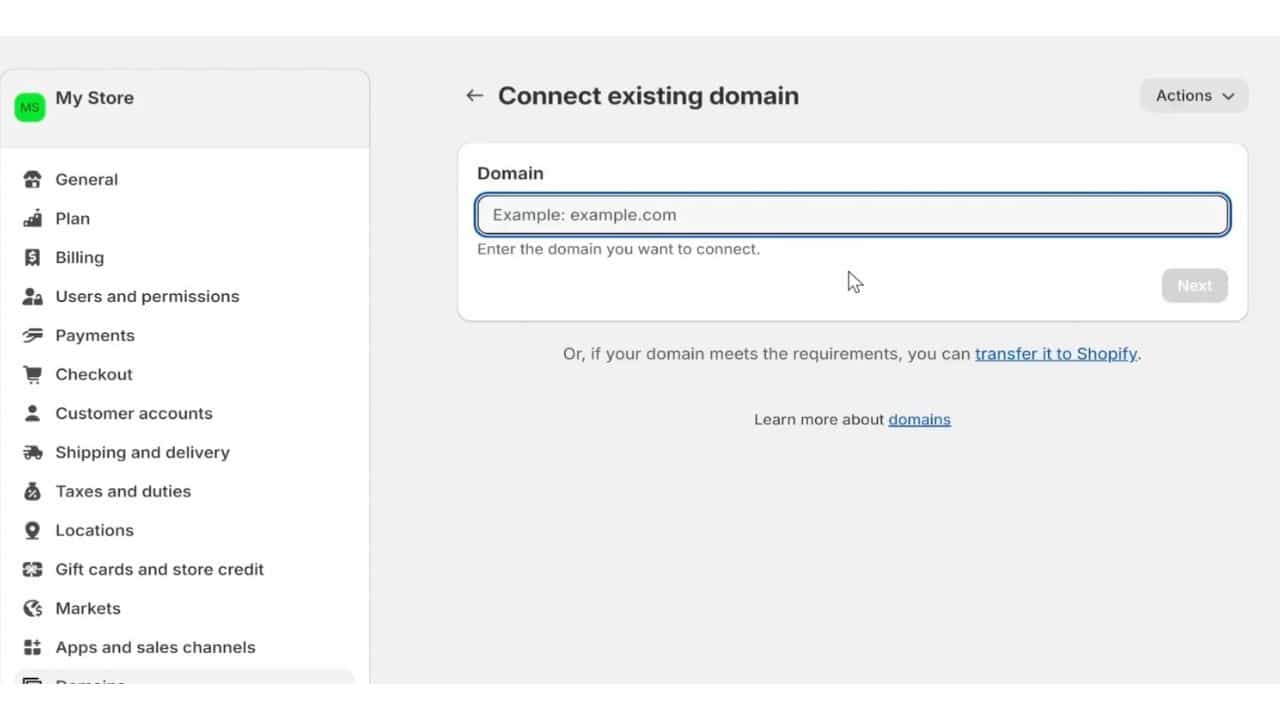
- If you haven’t connected a domain to your Shopify store yet, click “Connect existing domain” and then select the “Transfer” option.
- If you already have a connected domain, click on Transfer Domain.
- Enter the domain name you wish to transfer (without “www”) and click Next.
- Click “Verify Domain” to ensure it’s ready for transfer.
- If the domain is unlocked, you’ll see a “Domain Unlocked” notification.
- Click “Next” and enter the authorization code you copied earlier.
- Click “Next” again, then choose “Buy and Transfer” to complete the process.
You will receive an email from the domain provider asking for confirmation.
- Open the email and click the link to approve the transfer.
The transfer process can take up to 20 days to complete. So, to avoid any issues, keep your Squarespace site live until the transfer is finalized and traffic is fully redirected to your Shopify store.
|
Note: In some instances, your domain registrar (the company where you originally purchased your domain) might not be Squarespace or Shopify. If this is the case, you’ll need to update the domain’s DNS settings through your registrar to direct it to Shopify’s servers. |
Post-Migration Checklist
Once the migration is complete, there are certain aspects you should go through to ensure that your new Shopify site is error-free and performs optimally.
-
Test Website Functionality
Even a smooth migration will not translate to everything working just the way you want on your new online store. Therefore, thoroughly check your website for any functional and structural issues. Go through forms, navigation menu, internal links, and sliders.
-
SEO and Analytics Setup
The migration process tends to impact your SEO score. So make sure that all your meta titles, descriptions, and alt texts have been correctly transferred and are optimized for search engines. Also, reconfigure Google Analytics, Google Search Consoles, and any other tracking tools to monitor the traffic and performance of your new Shopify store.
-
Optimize Site Speed
Performance is crucial for a seamless user experience, so make sure your website is loading pages quickly. If you notice any performance issues, you need to optimize your online store. You can also opt for professional Shopify Development Services to boost your website’s performance.
-
Security Measures
Shopify offers better security than Squarespace; however, you have to ensure those security measures are set up properly. Also, add multi-factor authentication (MFA) and back up your website regularly.
Final Thoughts
In the end, Squarespace to Shopify migration might seem like a big task, but with the right steps and tools, it can be a smooth and rewarding transition. Shopify’s robust eCommerce features, superior payment options, and scalability make it a top choice for businesses looking to grow.
By following this guide, you’ll be able to transfer your data, set up your new store, and hit the ground running. Just remember to take your time, double-check your imports, and test everything before going live.
Frequently Asked Questions (FAQs)
- Is it worth switching from Squarespace to Shopify?
Switching to Shopify is worth considering if you’re looking for advanced e-commerce features. It offers a more robust platform for managing inventory, processing payments, and integrating with third-party apps. Squarespace is more design-focused, while Shopify excels in commerce functionalities.
- What data can be transferred from Squarespace to Shopify?
When migrating from Squarespace to Shopify, you can transfer various types of data, including product details (descriptions, names, images, weights, SKUs), order data (status, product price, quantity, customer details), and customer information (names, emails, addresses). Blog posts and page content are also transferable. However, some multimedia files and specific page elements may require manual migration due to compatibility issues.
- How long does it take to migrate from Squarespace to Shopify?
The duration of a Squarespace to Shopify migration varies depending on the size and complexity of your store. Factors include the number of products, customizations, and the volume of content. Generally, the process could take from a few days to several weeks. For a more precise estimate, it’s advisable to consult with a Shopify expert who can assess your specific needs and provide a timeline.
- Will the migration process affect my SEO ranking?
The migration process can temporarily impact SEO rankings if not managed carefully. Properly setting up 301 redirects for URLs, transferring meta titles and descriptions, and maintaining a similar site structure are some steps to mitigate SEO disruptions. Shopify offers various SEO tools to help manage these aspects. Post-migration, some fluctuation in rankings is common, but consistent monitoring and optimization will help restore and potentially improve SEO performance over time.