Over 45% of all websites on the Internet use WordPress, making it one of the most successful and popular website-building platforms. However, when it comes to operating an eCommerce website, there are far better alternatives, like Shopify.
This is because Shopify is a dedicated eCommerce platform and offers excellent features like tax calculation. Therefore, it is highly beneficial for businesses to migrate WooCommerce to Shopify.
While the migration might seem complex, we are here to help you make this process smooth and easy.
Is It Possible to Migrate From WordPress to Shopify?
Yes, it is very much possible to switch from WordPress to Shopify because they are both essentially running the same processes.
However, there are certain data that cannot be moved directly.
| Data: It can be further divided into Store Data and Content. |
Store Data: It is made up of customer information, order history, and more.
Content: It is media, blogs, and pages of a website.
What Data Can Be Migrated From WordPress to Shopify
During the migration process, you can transfer the following data:
- Products (including all details)
- Customer database
- Order history
- Categories and Collections
- Blog posts
- Pages
- Images and media
How can this WordPress Data be moved?
Products: CSV Files, API, Migration App
Customer database: API, Migration App
Order history: CSV Files, API, Migration App
Blog Posts: API, Migration App
Pages: API, Migration App
What Data Cannot Be Migrated From WordPress to Shopify?
While important data can be transferred, the following elements cannot be migrated:
- Plugins and Custom code
- Themes
- SEO Settings
Why Switch from WordPress to Shopify?
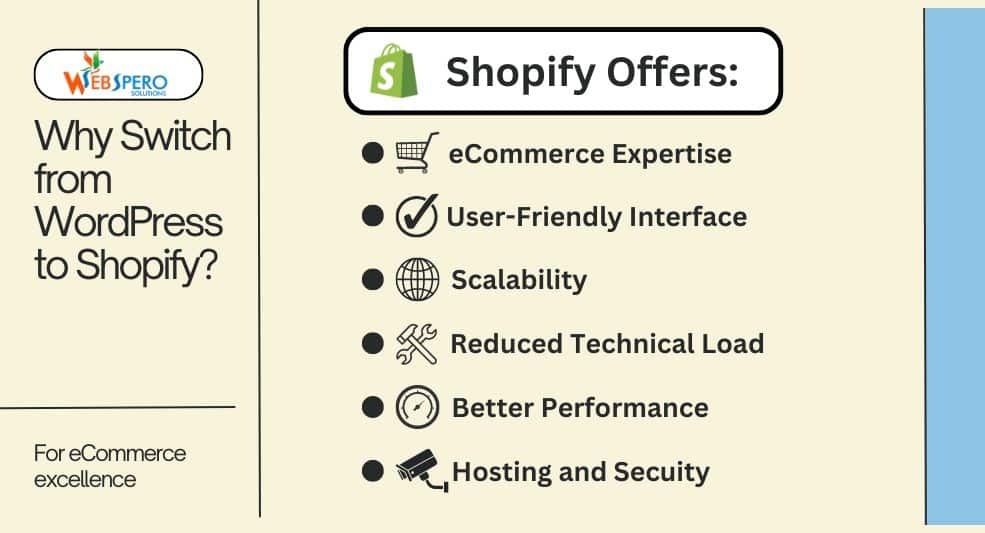
Specifically for online stores, switching to Shopify is highly beneficial. It provides the following benefits:
eCommerce Expertise
As mentioned above, Shopify is a platform designed specifically for online stores. It offers a seamless buying experience that simply cannot be matched with WordPress.
User-Friendly Interface
The user interface of Shopify is designed to make the user journey better and easier. This results in a website easily usable by all types of users, even the ones with little to no technical knowledge.
Scalability
Both Magento and Shopify provide a lot of features and plans to cater to all types of expansions. The former requires more server resources and increased maintenance costs.
Reduced Technical Load
Unlike WordPress, which often requires constant updates, plugin management, and hosting worries, Shopify handles all the technical aspects for you. This includes hosting, security, and maintenance, which means less time spent on backend tasks and more time focusing on sales and marketing.
Better Performance
Website speed is crucial for better user experience and ranking, especially for eCommerce platforms. Shopify is optimized for speed and performance even under heavy traffic.
Hosting and Security
With WordPress, you’re responsible for finding a hosting provider, managing server updates, and ensuring security; however, Shopify is a fully hosted platform that offers all the services. It also provides security benefits as well, including SSL certificates, PCI compliance for secure payments, and regular backups.
Considerations Before Switching to Shopify
Before you begin migrating your online store to Shopify, thorough preparation is crucial. Here are important considerations:
Cost and Plans
Undoubtedly, Shopify is better for eCommerce websites; however, it does come at a cost. It is a subscription-based service, and depending on the plan you choose, recurring fees can increase rapidly. So carefully calculate your expenses beforehand.
Limited Customization
Where WordPress offers full control over customization, Shopify, on the other hand, offers a more controlled environment, especially for plugins and custom code. Thoroughly examine your WordPress store to see if you are using any specific code or functionality and their Shopify alternatives.
Step-by-Step Guide to Migrating Your Site From WordPress to Shopify
Setup Shopify Account

To get started, simply visit the official Shopify website and click on Start free trial. Then, add your details (store name, email address, and password) and complete the registration process.
Select a Plan
Simply choose the plan that aligns with your business needs and provide the billing details to activate your plan.
Choose a Shopify Theme

To select a theme similar to your old WordPress theme, go to the Shopify Admin Panel, click on Online Store, and select Themes.
Choose a theme and click on Install to apply it.
To make the theme appear just like your previous online store, access the Theme Editor. Make appropriate changes and apply the new theme.
Backup Your WordPress Site

Before you begin migrating your data, it is important that you create a WordPress backup. In case something happens during the migration process, you will at least have a copy of all your store data and content.
To back up your WordPress website, first install a backup plugin like UpdraftPlus and BackupBuddy. These allow you to automatically back up your entire website. However, if you prefer manual control over the process, you can access the hosting panel, download all the files, and export them.
Transfer Data and Content
This is the most important and time-consuming part of the migration process. Also, note there is a specific order of data transfer you must follow to ensure error-free migration to Shopify. Import data in the following order:
- Products
- Customer database
- Order history
There are three methods to transfer data and content.
Using a Shopify Migration App
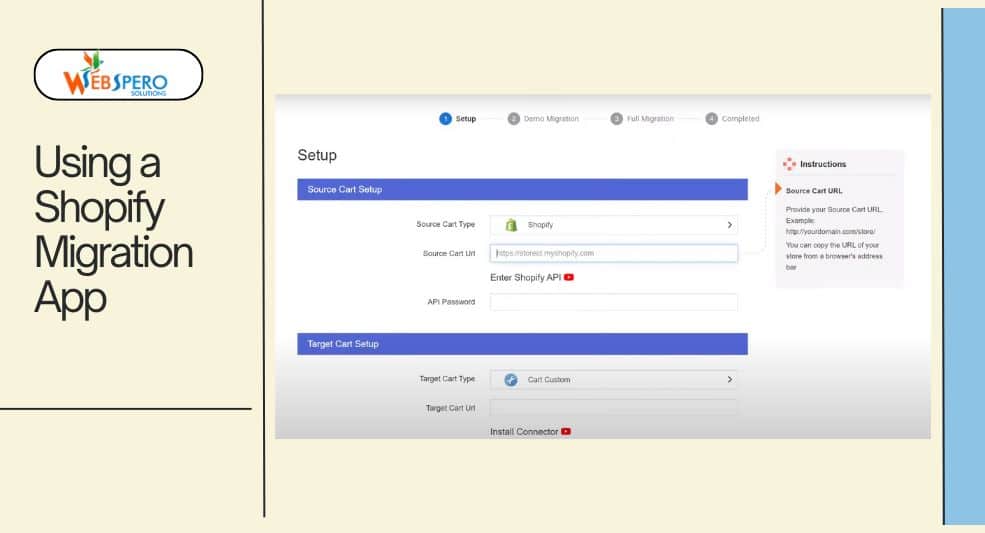
As the name implies, this method involves using one of the many migration apps available on Shopify. These apps use APIs to transfer the data, meaning they can be used to move large amounts of data in one go.
While you can choose from free and paid apps, Litextension is an excellent choice. In this, you choose WordPress as the source and Shopify as the target. Then, select the data you want to move.
This method is ideal for:
- Store Data
- Blog Posts
Manual Data Transfer via CSV files
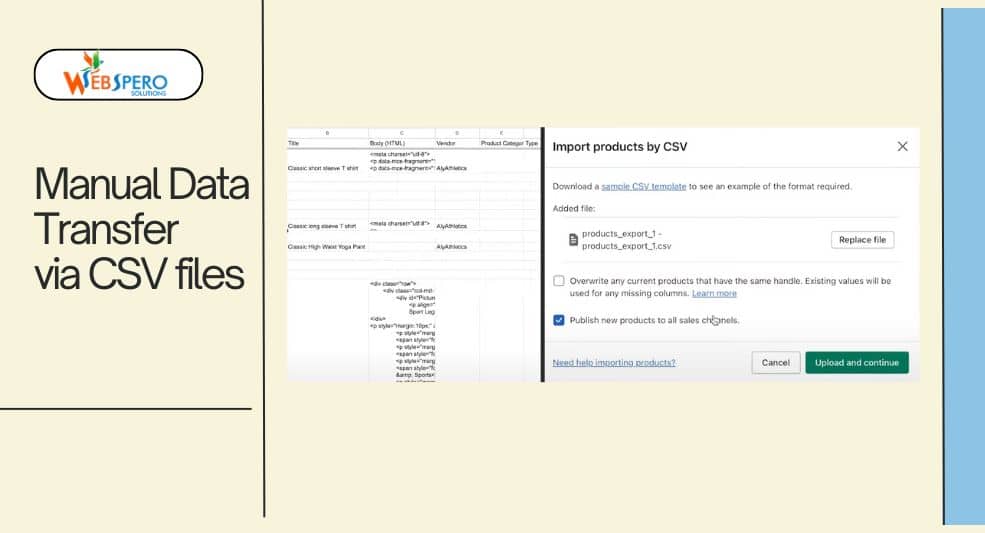
Comma-separated value files can be used to manually export products and customer databases from WordPress.
Thankfully, WordPress offers different plugins to help you export the information. Once you’ve exported CSV files, the next step is to import them to Shopify. Here’s how to do it:
Click on Products in Shopify Merchant Dashboard
Navigate to Import options
Click on Add File and select the exported CSV files
Click Upload and Continue
This method is ideal for:
- Products
- Customer database
Copy and Paste Method
This is strictly a manual process. In this, you pick and choose the content you want to move to Shopify. Simply, copy the content from WordPress and paste it into the appropriate spaces of your Shopify store. Please note that this method is only viable for small businesses.
This method is ideal for:
- Products
- Blog Posts
- Business Information
- Policies
Set Up Shipping
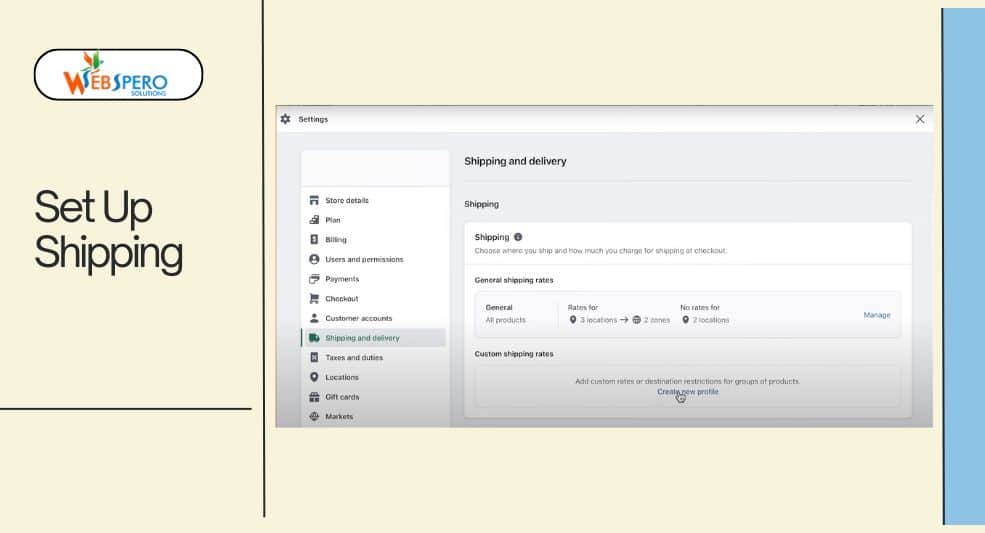
Once you’ve moved all your data to Shopify, you need to make some tweaks to help Shopify handle and calculate shipping costs. To setup shipping, follow these steps:
- Click on Shipping and delivery under Settings.
- Add current shipping address for accurate shipping rates.
- Enable shipping to different regions and countries (if applicable).
- Set up shipping rates for the mentioned shipping areas.
| NOTE: Add accurate information in this process to avoid overcharging. |
Set Up Taxes
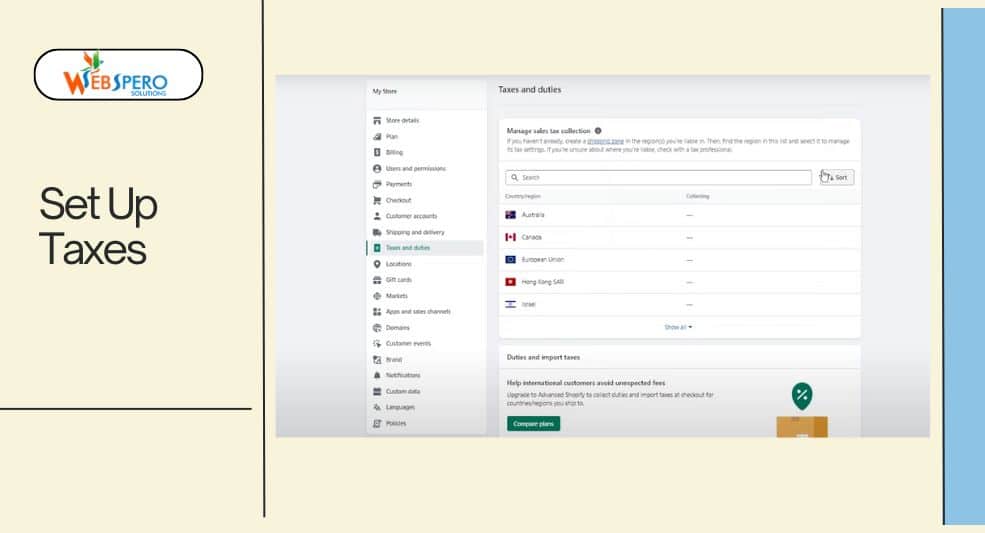
After adding shipping information, Shopify will automatically calculate tax based on the destination and that particular location’s tax regulations.
However, to remove tax calculations for products that are exempt from tax, you need to do a tax override. Here’s how to do it:
- Click on Products on the Shopify Dashboard.
- Navigate and click the Pricing section.
- Then select the product and uncheck Charge taxes on this product.
- Click Save.
Set Up Payment Providers
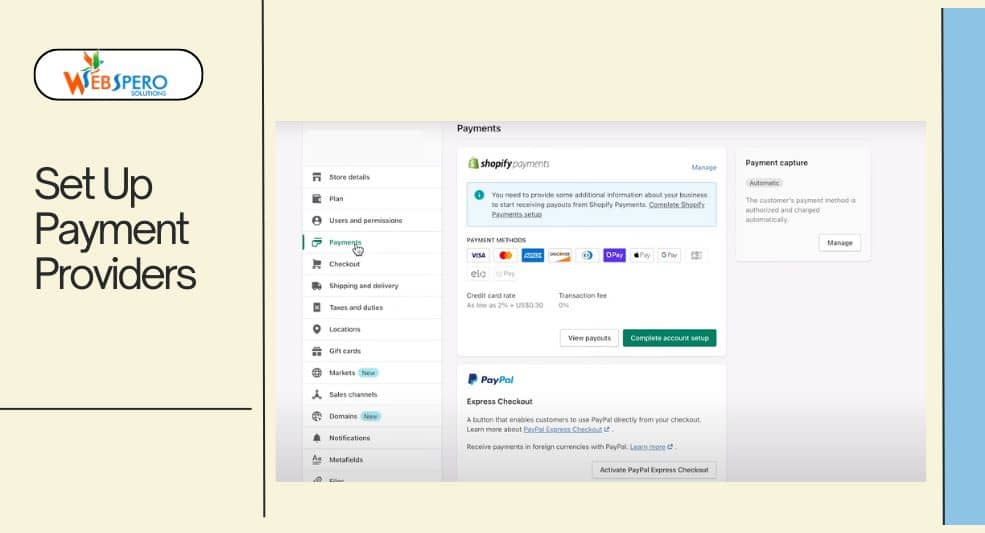
The next step is to enable payments on your Shopify store. To do this, you’d need to choose a payment provider by going into Settings, selecting Payments, and completing your account setup.
| NOTE: If you have a credit card payment provider, you can simply click on Activate Shopify Payments, add banking details, and press Save. |
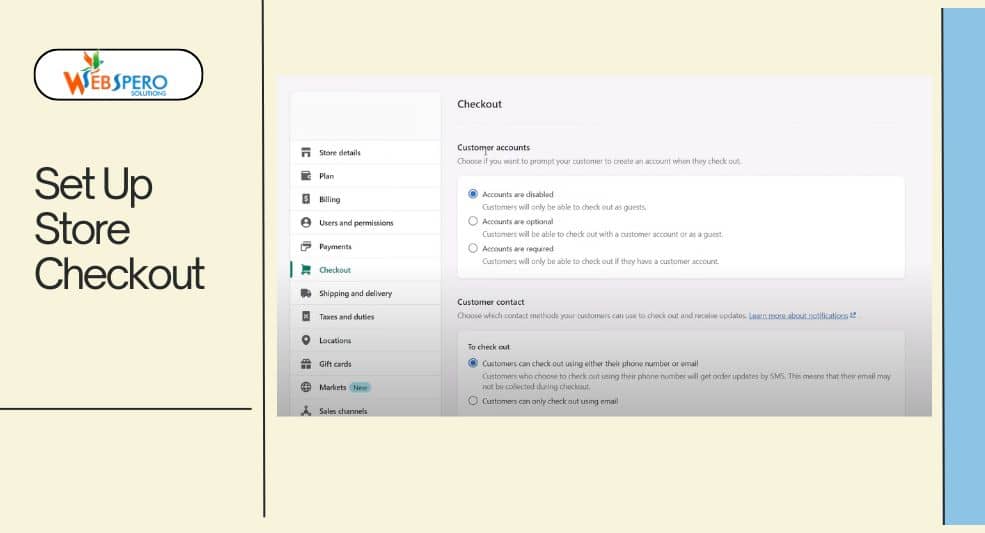
Set Up Store Checkout
Follow these rules to set up your Shopify store checkout:
Add your store policy by going to the Settings and clicking on Policies. Here, you can paste your policy from WordPress. Click Save.
To edit customer checkout information, click on the Checkout option and configure the checkout experience and what data needs to be collected. Click Save.
Test Orders
Once you’ve moved all of your WordPress data and finished setting up your store, you need to test orders to ensure everything is working properly.
Disable Real Payment Methods
- Go to your Shopify dashboard and click on Settings at the bottom left.
- Navigate to Payments and find your enabled credit card provider.
- Click Manage and then click Deactivate to disable the real payment method. A popup will appear to confirm the deactivation.
Set Up Bogus Gateway for Testing
- In the Shopify Payments section, click Manage and choose Switch to a third-party provider. Confirm this action when prompted.
- Scroll down to the See all providers option and click on it.
- From the dropdown menu, select (for testing) Bogus Gateway.
- Click Activate to enable the Bogus Gateway, then click Save to confirm.
Place a Test Order
Now that the test gateway is enabled, simulate a customer purchase to test your store’s checkout process:
- Go to your store and add a product to your cart.
- During checkout, use the following test credit card details:
- Name on card: Bogus Gateway
- Credit Card Number:
- Enter 1 for a successful transaction.
- Enter 2 for a failed transaction.
- Enter 3 to trigger an error message.
- CVV: 111
- Expiry date: Any future date.
Check for Issues
Completing the test order will allow you to see if there are any issues with your Shopify checkout process, such as payment errors, order confirmations, or product availability.
Revert to Real Payment Methods
After you’ve successfully run your test orders:
- Return to the Payments section in your dashboard.
- Click Manage next to (for testing) Bogus Gateway.
- Click Deactivate to remove the Bogus Gateway.
- Reactivate your real payment method by following the same steps as before, selecting your preferred provider.
Post-Migration Checklist
Once the migration is complete, there are certain aspects you should go through to ensure that your new Shopify site is error-free and performs optimally.
Test Website Functionality
Thoroughly check your website to ensure everything works, i.e., forms, navigation menu, internal links, and sliders. Also address any structural issues to ensure a seamless user experience.
SEO and Analytics Setup
Review your SEO settings post-migration. Ensure that all meta titles, descriptions, and alt texts have been correctly transferred and are optimized for search engines. Additionally, reconfigure Google Analytics, Google Search Console, and any other tracking tools to monitor your traffic and site performance on Shopify.
Optimize Site Speed
Make sure that the website is performing efficiently and has faster loading times. If you are unsure how to optimize your new Shopify site for speed, don’t worry. Our Shopify Development Services enhance loading speeds and provide comprehensive migration support to ensure a smooth transition.
Security Measures
While Shopify handles SSL certification, you must ensure everything is set up properly. We recommend multi-factor authentication (MFA). Additionally, set up regular backups for your website to avoid data loss.
Common Migration Issues and How to Fix Them
You may have conducted the migration process carefully, but certain issues can arise when you convert WordPress to Shopify.
Missing Content
Depending on how the WordPress website was set up, all the store data and content may not transfer or transfer incorrectly.
To fix this, you can utilize tool’s like Cart2Cart or Shopify’s Import Store feature to move your data.
Broken Links
WordPress and Shopify have different URL structures. Shopify forces URL structures like /products/ and /collections/. These are very different from WordPress and if not addressed can lead to broken links.
To fix this, simply set up 301 redirects for old WordPress URLs.
Design Discrepancies
Similar to broken links issues, due to the difference in themes and frameworks, your WordPress site design may not transfer exactly like you want to Shopify. To fix this, you need to choose a theme that resembles your old site.
SEO Impact
WordPress to Shopify migration can negatively affect your SEO ranking. This is the reason why we recommend SEO and analytics set up right after the migration. If you encounter a lower SEO ranking, recheck your SEO settings on Shopify and submit a new sitemap to Google Search Console to update the search engine of your site’s migration.
If you are unsure, you can always consult a Shopify expert.
Wrapping It Up
While it may seem like a complex process, with the right tools and strategy, you can easily migrate from WordPress to Shopify.
Also, moving your eCommerce website to Shopify is highly recommended as it offers more features and better user experience.
Frequently Asked Questions (FAQs)
Is it worth switching from WordPress to Shopify?
For online stores, it is absolutely worth migrating to Shopify because it provides eCommerce-specific features like tax calculation, better user experience, scalability, and more.
Will my site lose data during the migration?
In short, yes. However, with proper backup and migration tools, you can minimize the risk of data loss.
Will the migration process affect my SEO ranking?
If not managed carefully, it can result in a temporary drop in SEO rankings. However, with proper redirects and using SEO plugins, you can minimize the risk.
Is it beneficial for small eCommerce companies or large enterprises?
Transferring your operations to Shopify offers tremendous benefits to both small and large-scale eCommerce businesses.
Do I need technical experience for migration?
While you do not require it, having technical expertise can ease the process. Moreover, you can opt for professional WordPress to Shopify migration services like ours.

